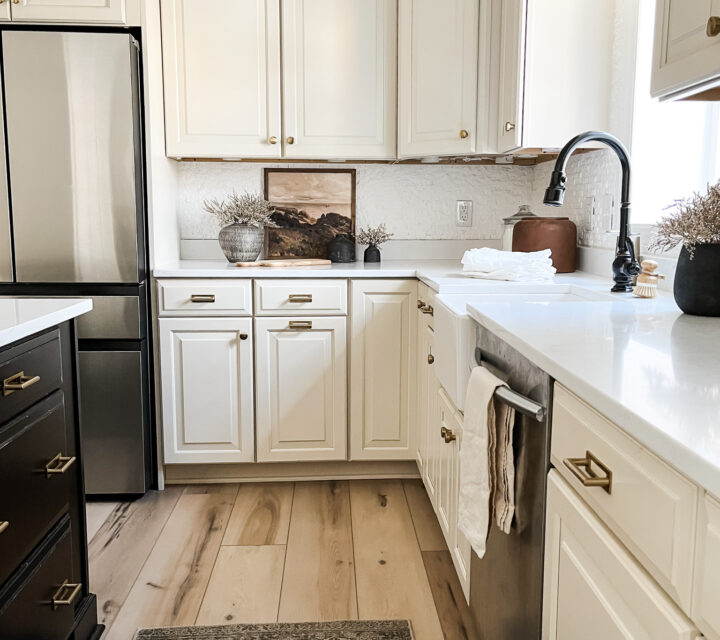
Today I want to chat with you about our new farmhouse sink addition! I can’t believe I’ve got my own farmhouse sink y’all!!


We’re currently undergoing a mini kitchen renovation and swapping out our granite with white quartz countertops. We figured that this would be the perfect time to install a farmhouse sink….and so this project began.
I’ve wanted a big, white farmhouse sink since we designed and installed our kitchen six years ago. I didn’t end up getting one then, but I have one now so that’s all that matters! I am tickled pink about it!!
I wanted to write this post today because we learned a few things during the process of switching out our old sink with our new farmhouse sink. There are several things I wish we would’ve known beforehand.

If you are thinking about getting a farmhouse sink, you’re in the right place.
Read this article before you get a farmhouse sink so you can avoid any potential frustrations along the way.
HOW WE INSTALLED OUR SINK & WHAT WE LEARNED ALONG THE WAY
For the farmhouse sink installment, we had to:
Remove the current countertop
First things first. We had to remove our granite countertop by the sink in order to put the new farmhouse sink in.
Since we are getting new countertops as well as a new farmhouse sink, the countertop company wanted to measure the area with our new farmhouse sink installed, before proceeding with the new countertops.
That ended up pushing the entire process back because we had to order a new sink and get it fully installed before they could come back to remeasure.
In order to install the sink, we had to remove our granite countertop that sat overtop the existing sink.
Fortunately, Jason and my dad were able to do this themselves, which saved us some money!
Purchase a farmhouse sink that is a couple inches less than the cabinet width
Our sink cabinet is on the smaller end at only 24 inch wide. When we were looking at purchasing a farmhouse sink, we kept seeing sink options for 24 inches or wider. We thought we needed to go with a 24 inch wide farmhouse sink and that it would be the entire width of our cabinet.
We ordered a 24 inch farmhouse sink and when it arrived I was so excited! We got it out and held it next to the cabinet and realized it was too big. We measured the sink and it was actually 24 and 1/4 inches. It was just slightly wider than our 24 inch sink cabinet.
We knew it wouldn’t work because it would hit our dishwasher and cabinet on the opposite side.
So, we returned it and went back to the drawing board.
We did more research and realized we should’ve bought a farmhouse sink that was a couple inches smaller than our cabinet. We did some digging and realized they make 20 inch farmhouse sinks, which we didn’t even notice the first time.
We purchased this farmhouse sink and it is just as beautiful as the picture. Surprisingly, it is more expensive than a 24 inch farmhouse sink. I’m not sure why that is.
Build a sink base
Jason had to build a sink base for the farmhouse sink to sit on. To build the base, he first built a box using six 2 x 4’s. He then put a 3/4 inch piece of plywood on top for the sink to sit on.
Purchase & install new cabinet doors that are shorter
We knew going into this project that our cabinet doors would need to be adjusted to accommodate for our farmhouse sink. We originally had 24 inch tall doors on our cabinets. Here’s what the old doors looked like:

We needed 18 inch tall doors to accommodate for our sink. We also needed a filler board to go between the sink and doors. Fortunately, we were able to order new doors from our kitchen supplier as well as a filler board.
We have Waypoint 610 painted silk doors.
Here is what the new doors look like:

Make filler boards on either side of the sink
When we placed the new sink in the cabinet, we knew there’d be about a 1/2 inch gap on either side of the sink.
To fix this, Jason made customized filler pieces and put them in the edges. We used the putty that came with our new cabinet doors to run along the edges so the pieces are noticeable.
You can see in the photo above where the filler boards were added on either side of the sink.
Reconnect all plumbing


Once the farmhouse sink was in, Jason installed a new garbage disposal and also did the plumbing work to hook up our faucet.
He had to make a makeshift countertop in order to install our faucet. He used a piece of old wood as a countertop, which does the trick until our new counters are installed.
OVERALL TAKEAWAYS
After going through the process of taking out the countertop, ordering new cabinet doors, building a sink base, cutting filler boards, and reconnecting the plumbing and garbage disposal, we realized how much work it really was.
We had to make our current cabinet fit a farmhouse sink instead of the other way around. There are cabinets meant for farmhouse sinks and ours was not one of them.
The takeaway here is that you should plan for a farmhouse sink in a kitchen renovation if you want one. Your cabinet builder can build a specific cabinet for a farmhouse sink which will make the whole process MUCH easier.
It’s not impossible to put a farmhouse sink in an existing cabinet, but there sure are a lot of moving parts to it.
BEFORE & AFTERS


KITCHEN PLANS FROM HERE
We’re officially on the schedule to get our new countertops put in. We’ve got three weeks to go until the countertop company can install them. I’ll just have to deal with not having a countertop in that area until then.
I am super excited to see how our kitchen will look when it’s all done!
By the way – we are getting white quartz in the color misterio in case you’re wondering.
You may have also noticed in the before and after shots that our backsplash and hardware look different. As part of our kitchen renovation, I also painted our existing stone backsplash white and swapped out some of the hardware with cup pulls.
I can’t wait to show you the end result of our mini kitchen renovation when it’s complete!!


